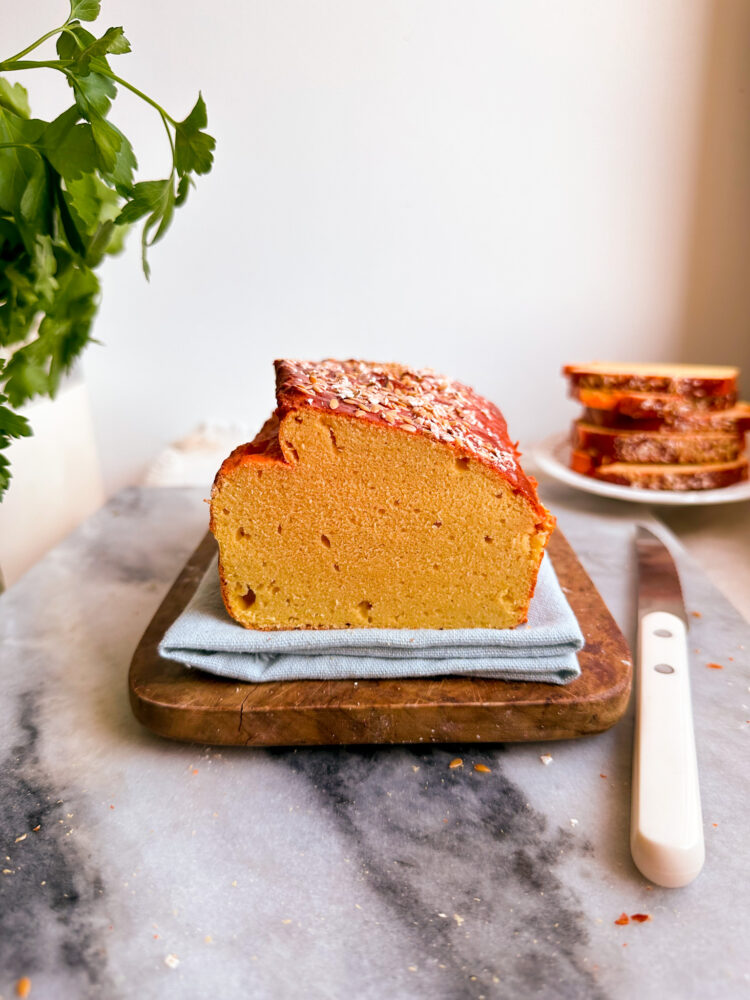

This unique red lentils bread recipe is not only gluten-free, grain-free and vegan, but also made with only one ingredient – red lentils, exactly! This bread is perfect for those who are looking for a healthy, low-carb alternative to traditional bread.
Red lentils (this is the type we are talking about)are a fantastic source of protein and fiber, making them an excellent addition to any diet. They are also a good source of iron, which is essential for maintaining healthy blood levels. Unlike traditional bread made with wheat flour, this lentil bread is free from gluten and is perfect for those with gluten sensitivities or celiac disease.
The best part about this recipe is that it’s made with whole red lentils, which means it’s unprocessed and retains all of the lentils’ nutritional benefits. This bread is also incredibly easy to make, requiring only a few ingredients and minimal preparation time.
So, if you’re looking for a healthy and delicious gluten-free bread recipe (high in protein, too), look no further than this red lentil bread. Let’s get started!
How to make this red lentils bread – step by step:
Flourless red lentils bread
Course: SidesCuisine: IndianDifficulty: Easy20
servings5
minutes45
minutesA grain-free, dairy-free, gluten-free, vegan bread alternative made with only red lentils.
Ingredients
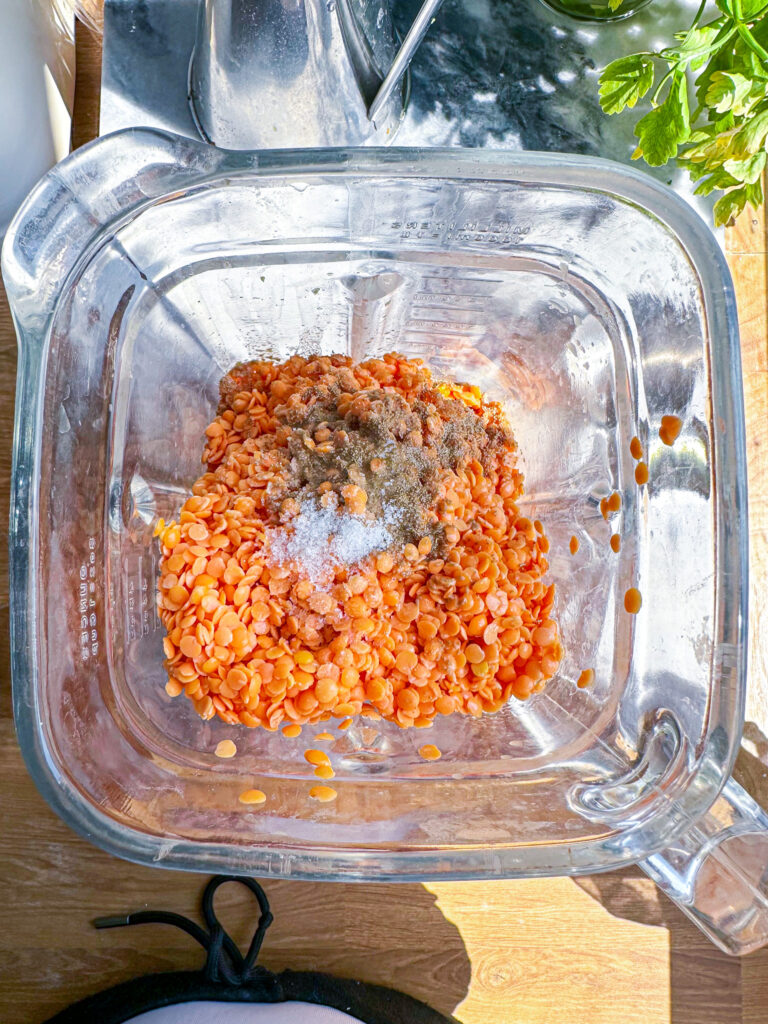
2 cups red lentils (350 g)
1 tsp dry yeast (5 g)
¼ cup water (50 g)
2 tbsp olive oil (35 g)
1 tsp sea salt
How to
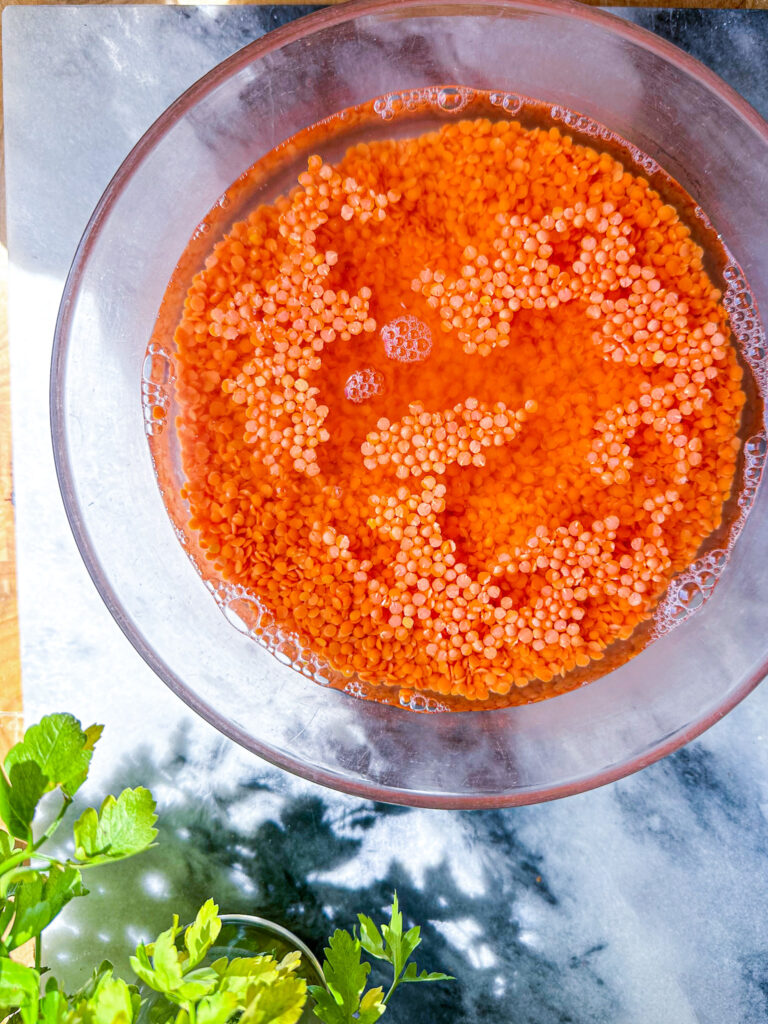
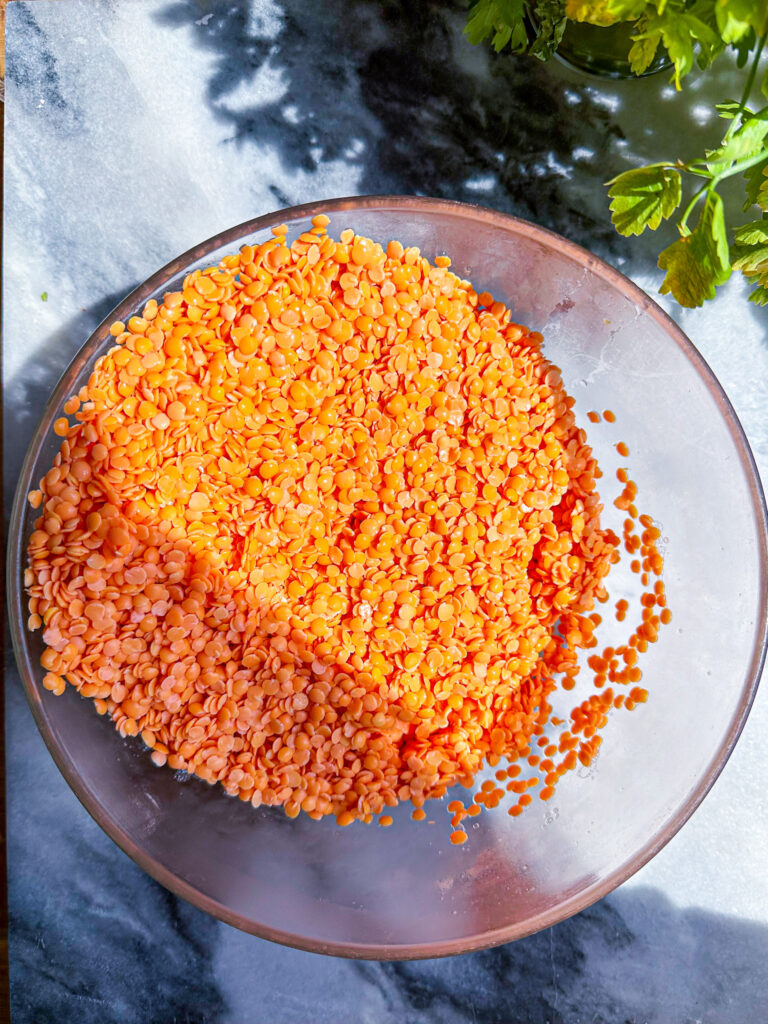
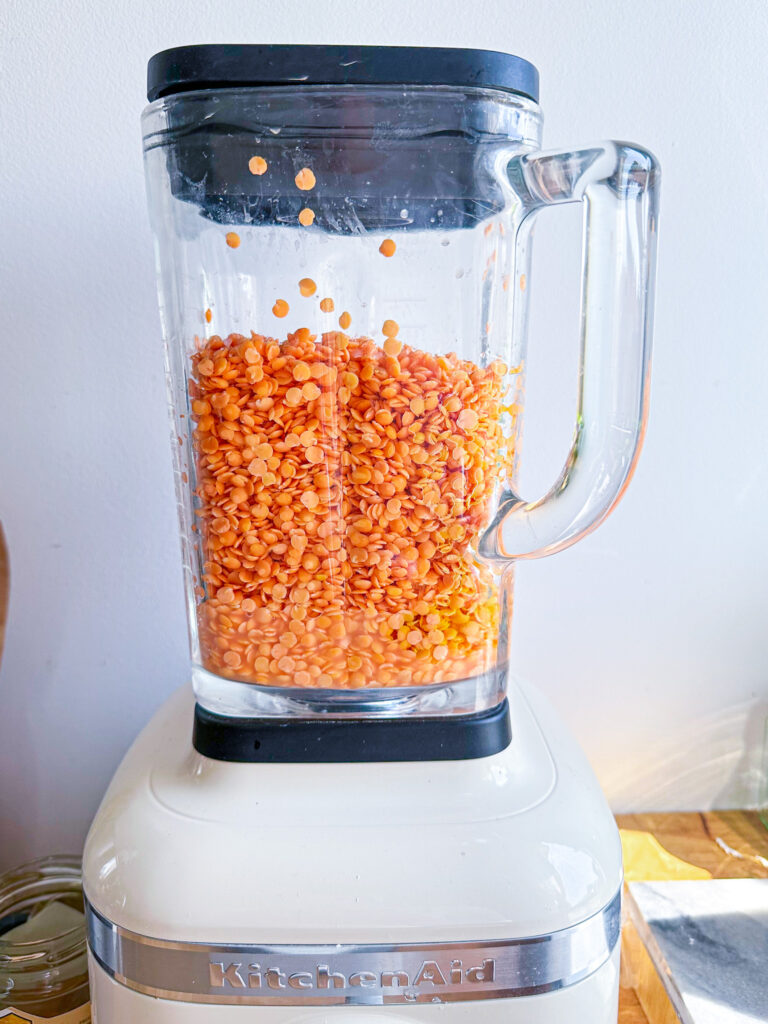
- The night before baking, rinse and drain the red lentils, then place them in a large bowl and cover with water. Let them soak for at least 2 hours, or overnight in the fridge, up to 24 hours.
- After the soaking time, preheat the oven to 355°F/180°C.
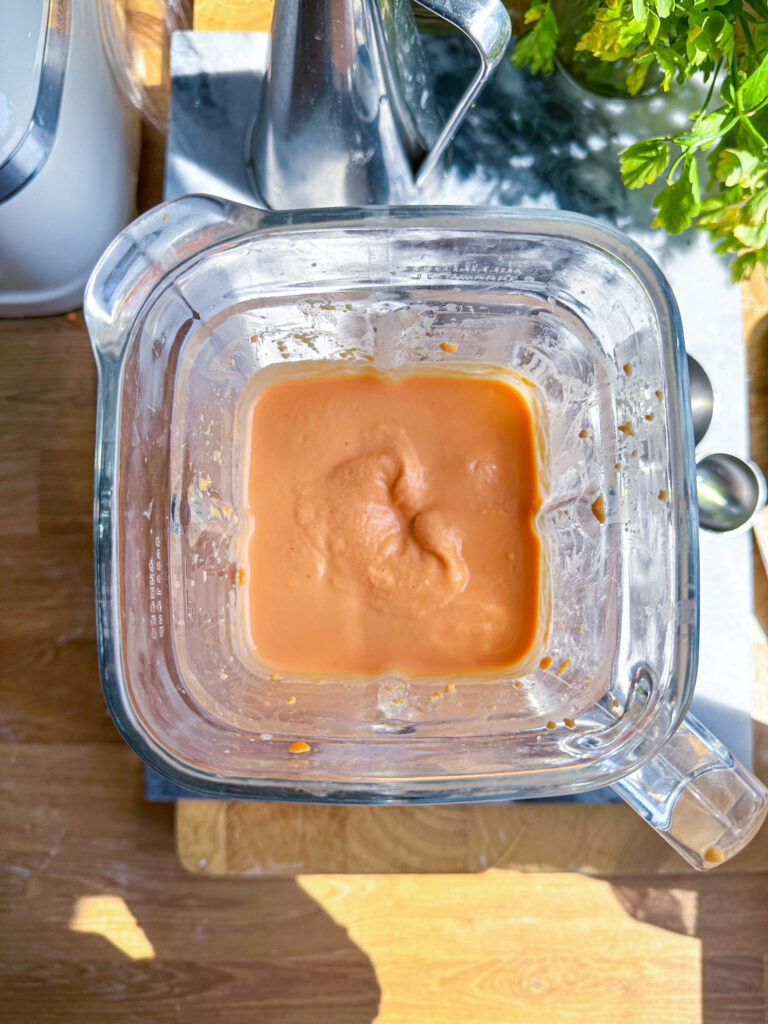
- Once the lentils have soaked, drain off any excess water and add them to a food processor along with the dry yeast, salt, olive oil, and water.
- Blend the mixture until it becomes smooth and creamy.
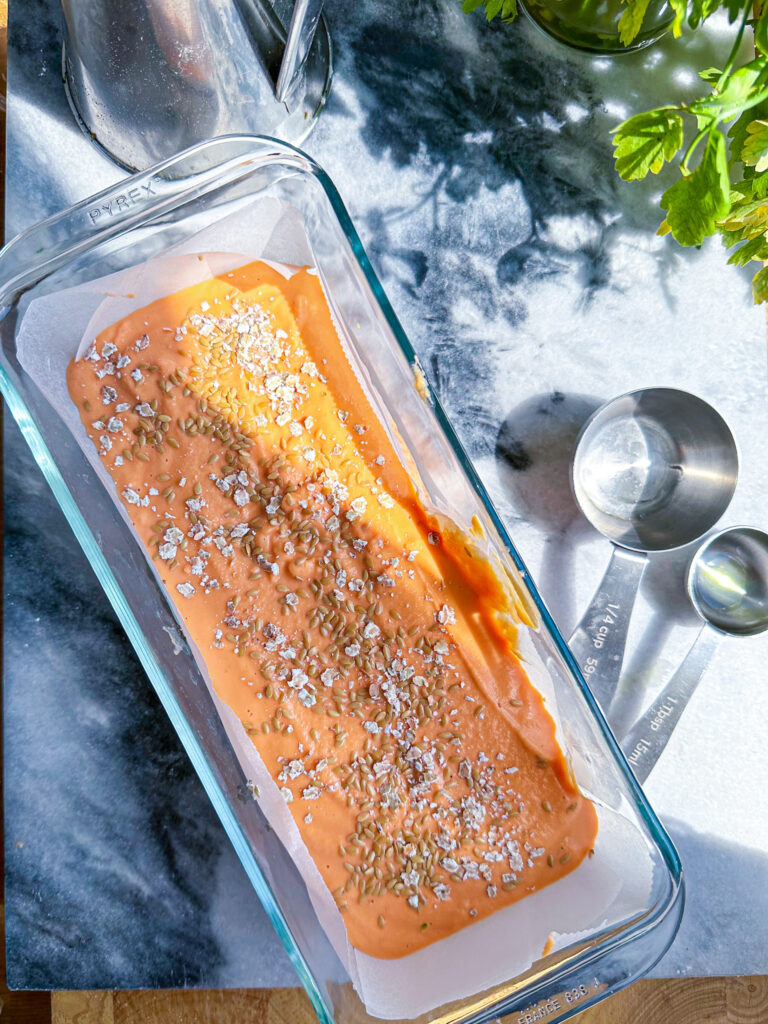
- Line a 12″x4″ (30×10 cm) loaf pan with parchment paper, pour the batter into it and smooth the top with a spatula. Sprinkle with toppings like seeds or oats if desired. Let it sit for 1 hour before baking.
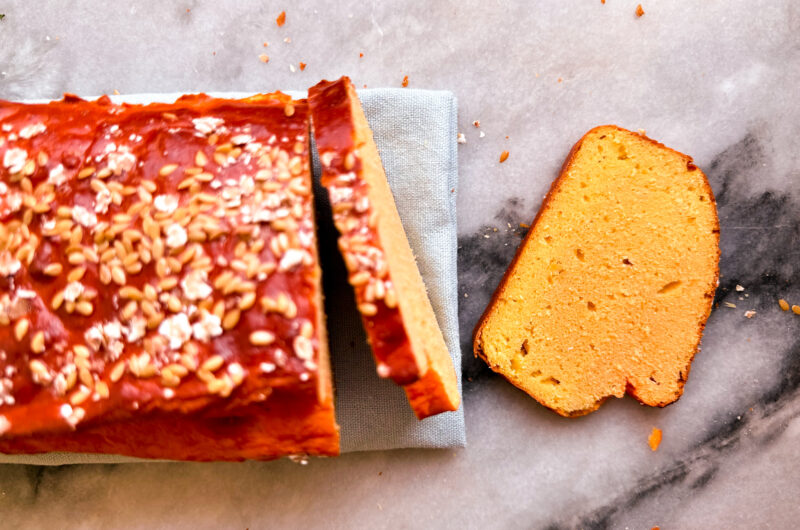
- Bake the bread for 45-50 minutes, or until a toothpick inserted into the center comes out clean.
Let the bread cool in the pan for 10 minutes before removing it from the pan and transferring it to a wire rack to cool completely. - Slice and serve the bread as desired. It’s delicious toasted and topped with avocado, hummus, or nut butter.
Want more recipes like this?
Follow me @martainthejar on Instagram and see!
Ready to try this recipe?
Save it from my Pinterest @martainthejar !
Looking for other grain-free alternatives to bread? Take a look at these chickpea flour wraps or this quinoa bread that I sometimes make with 100% quinoa flour and it comes out perfect!
And don’t forget to follow me on Instagram or Pinterest to stay updated on the latest news. Last but not least, I also have an online course with video lessons on how to bake gluten-free bread easily. If you are more of a visual learner, follow this link to start baking with me!

Hi, I wasn’t sure how to rate it as it didn’t quite work for me and I think it was the loaf pan that I used. Can you tell me exactly what size loaf pan you used? Was it a 12×3 inch? I made this in a 9×5 inch pan and it fell in the middle. It tastes great on the ends and I will use the middle for croutons! I am just not familiar with that pan size and I want to make sure I buy the correct one.
Thank you!!!!
Hi Jane, the pan I used was a tall-sided pullman loaf pan measuring 12×4 inches. Also a sandwich bread loaf pan can be good to use! I hope this helps and I’m happy that you liked it anyway.
Hi, I wasn’t sure how to rate it as it didn’t quite work for me and I think it was the loaf pan that I used. Can you tell me exactly what size loaf pan you used? Was it a 12×3 inch? I made this in a 9×5 inch pan and it fell in the middle. It tastes great on the ends and I will use the middle for croutons! I am just not familiar with that pan size and I want to make sure I buy the correct one.
Thank you!
This has become my “go to” recipe for bread these days! Simple, inexpensive, easy, and amazing flavor! I have tried several of Marta’s variation suggestions (e.g., no leavening at all, egg instead of yeast, baking powder instead of yeast, etc.). All worked well and turned out as Marta described. However, the basic recipe here is still my favorite! It is incredibly tasty as is and lends itself to variations (e.g., savory with sautéed onions and peppers, a meal on its own with mixed veggies baked in). Great recipe — thank you!
Hello Jody, thank you for this amazing review! I’m really happy you are enjoying this!
I like this recipe but my bread is dry and I followed the recipe what can make it soft and how can I store it for a couple of days without drying out
You can try to add 1 tbsp of psyllium husks + 1 tbsp of water. But unfortuntately it will never be soft as a bread made with grains flours. Let me know if you try!
Hi, Marta. I’m looking at the possibility of using what Americans call fizzy water (sparkling water) instead of yeast (I can’t use due to my allergies) or baking soda. Have you experimented with this as an alternative?
Hi Frank,
yes you can use baking soda. To ensure best results, add ½ teaspoon of vinegar or cider vinegar to react with the baking soda. You can also replace with an egg (but in this case you should remove ¼ c of water from the total amount).
I also tried it without any yeast / leavening agents, it will result a bit denser but still good.
How should this be stored? Refrigerator?
No it can stay on the counter for 2 to 3 days. If you want to have it for longer, you can slice it and freeze the slices.
Just made this and while baking filled my kitchen with a wonderful smell. It tastes great too. It have a red color on the inside but the outside was red.
I wasn’t confident with this but it turned out amazing and with some small airy holes in it too. My GF pal throughly enjoyed it and so did we, especially toasted with hummus. Thank you so much for the recipe xxx
Thank you for the review, I’m happy you loved it!
Hi Marta,
You said you baked this without yeast and it turn out softer. What leavening did you use in the loafs without yeast, baking soda or baking powder?
Did you try adding sugar for the yeast to feed on in other loafs?
It seems it doesn’t need a binder such as eggs?
I’ve been baking rice blender bread, which takes a learning curve to keep it from sinking in the middle, but I’ve managed to over come that. Looking forward to trying this bread.
Thanks for posting this recipe. I prefer recipes with basic gluten free ingredients.
George.
Hi George, without yeast it was less soft! For that first version, I didn’t use any leavening ingredient. But if you can have it, I suggest following this recipe WITH dry yeast in it.
No binder is needed, the soaked lentils stay perfectly together when baked.
Gluten-free bread without gums or commercial blend is my main goal in this blog, I hope you will also find other recipes you will like!
Happy baking!
Marta
I loved how simple and inexpensive this is to make, which makes testing it a no-brainer. Even more, I love that it’s loaded with nutrition and is very satisfying, a welcome change from some gluten-free alternatives I’ve tried. Unfortunately I had forgotten how dirty lentils can be, and though I rinsed them multiple times, there was grit and chaff that remained. Next time I’ll sift out as much dirt as I can before rinsing them, and the result will be even better. Thanks for this recipe!
Thank you Toni for trying this recipe, I’m happy you loved it! It’s one of my favorites, too!
Great recipe. Easy to make and the bread tastes wholesome. I used brown lentils and sprinkled with white sesame seeds on top. The yeast did help raise the bread which made it soft. Thanks for the recipe and will definitely make again.
Thank you for your feedback, I’m happy you liked the recipe and the bread!
But, what’s the point of adding yeast if there’s not time to ferment?
Hi Clara, I’ve tried this recipe also without yeast and it’s way less soft. I guess the yeast has the time while baking to create some air bubbles anyway!
Pingback: 100% Buckwheat bread with walnuts (gluten-free) - Marta in the jar